Building Your First WSGI Application
Now that we understand the basics of web servers and WSGI, let’s build our first WSGI application. This section will guide you through creating a simple WSGI application from scratch.
Step 1: Set Up Your Environment
First, make sure you have Python and pip installed on your system (I hope you’re using linux). If not, you can download and install them from the official Python website.
Create a new directory for your project and navigate into it:
mkdir my_wsgi_app
cd my_wsgi_app
Step 2: Create Your WSGI Application
Create a new file called app.py and open it in your favorite text editor. Add the following code:
#app.py

def simple_app(environ, start_response):
    status = '200 OK'
    headers = [('Content-type', 'text/plain; charset=utf-8')]
    start_response(status, headers)
    return [b"Hello, World!"]

if __name__ == "__main__":
    from wsgiref.simple_server import make_server
    server = make_server('localhost', 8000, simple_app)
    print("Serving on http://localhost:8000")
    server.serve_forever()
This code defines a basic WSGI application called simple_app that responds with “Hello, World!” and sets up a simple server to run the application.
Step 3: Run Your Application
python app.py
You should see the message “Serving on http://localhost:8000”. Open your web browser and navigate to http://localhost:8000. You should see “Hello, World!” displayed on the page.
Step 4: Understanding the Code
Let’s break down the code in app.py:
The WSGI Application:
def simple_app(environ: dict, start_response):
    status = '200 OK'
    headers = [('Content-type', 'text/plain; charset=utf-8')]
    start_response(status, headers)
    return [b"Hello, World!"]
According to PEP 3333, the web application must be a callable (a function, method, class, or instance with a call method) that accepts two arguments:
-
environ: A dictionary containing CGI-style environment variables. This object must be a built-in Python dictionary. -
start_response: A callback function used to start the HTTP response. This is a callable accepting two required positional arguments:status: A status string of the form “999 Message here”. This is why we use status = “200 OK” instead of an integer with value 200. This part of the PEP is based on RFC 2616, Section 6.1.1response_headers: A list of (header_name, header_value) tuples describing the HTTP response headers. This response must be based on RFC 2616, Section 4.2
These arguments will be injected by the WSGI server when it calls the simple_app function.
It’s important to note that start_response MUST be called. Otherwise, the headers and status code of the response will not be set, and you’ll receive an error.
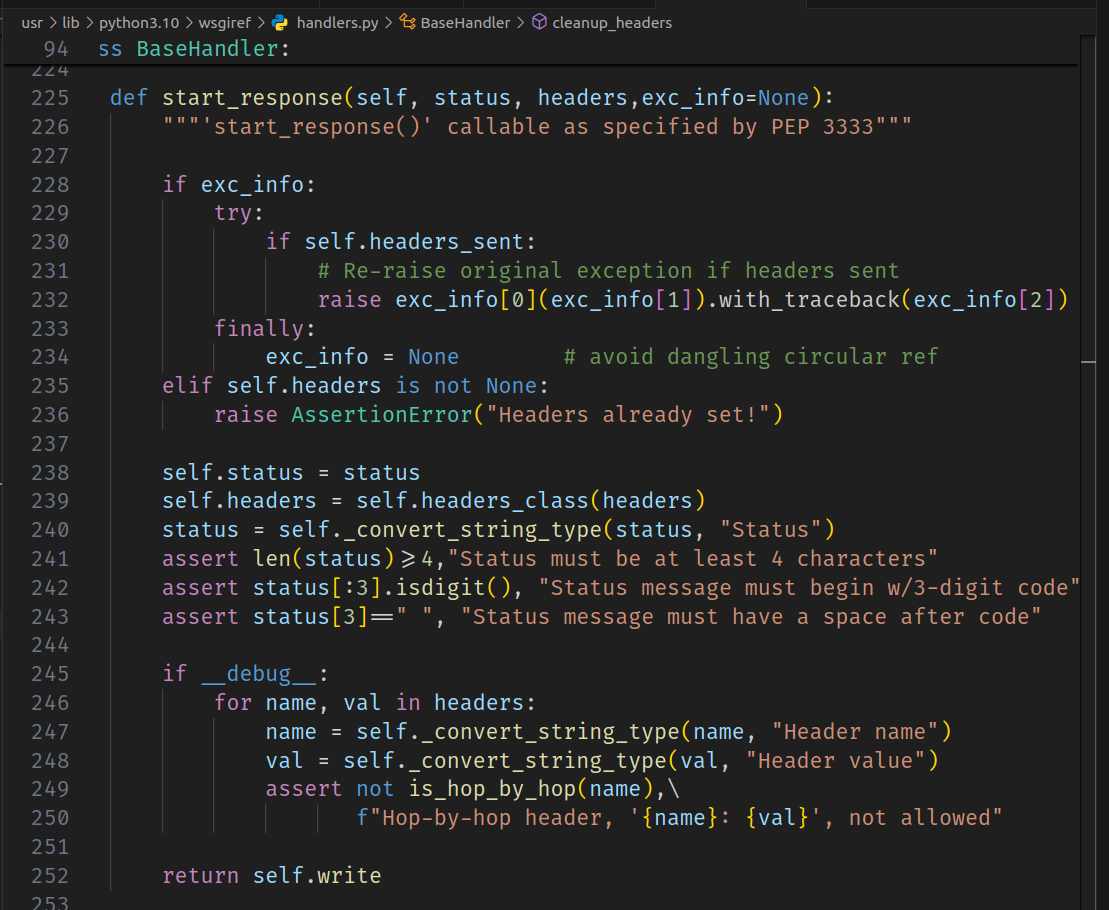
If you’re curious, you can look at the internal function start_response that is injected by the built-in module wsgiref. In the image below, you can see that start_response mainly:
- Checks if the headers are already set.
- Sets the
status. - Sets the
headers. - Performs a series of validations, like checking if the
statusis in the correct format.

Setting Up the Server
if __name__ == "__main__":
    from wsgiref.simple_server import make_server
    server = make_server('localhost', 8000, simple_app)
    print("Serving on http://localhost:8000")
    server.serve_forever()
Notice that make_server receives the function simple_app as an argument. This is where we tell the WSGI server to execute this function when it receives a call from a client.
-
make_server: A function from the wsgiref.simple_server module that creates a simple WSGI server. -
server: The server instance created by make_server. -
server.serve_forever(): Starts the server to handle incoming requests indefinitely.
Step 5: Adding More Features
You can extend your WSGI application by adding more features, such as handling different URL paths or serving HTML templates. Here’s an example of handling different paths:
def simple_app(environ, start_response):
    path = environ.get('PATH_INFO', '/')
    if path == '/':
        response_body = b"Hello, World!"
    elif path == '/goodbye':
        response_body = b"Goodbye, World!"
    else:
        response_body = b"Not Found"
        status = '404 Not Found'
        headers = [('Content-type', 'text/plain; charset=utf-8')]
        start_response(status, headers)
        return [response_body]

    status = '200 OK'
    headers = [('Content-type', 'text/plain; charset=utf-8')]
    start_response(status, headers)
    return [response_body]
With this code, navigating to http://localhost:8000/goodbye will display “Goodbye, World!”, and any other path will display “Not Found” with a 404 status.